Today, I’m sharing my latest battle with a gas stove top that had definitely seen better days. If you’ve ever let spills and splatters pile up (no judgment—we’ve all been there), don’t worry. I’ll walk you through the exact steps I used to bring my stove back to life. Grab your cleaning supplies, and let’s do this together!
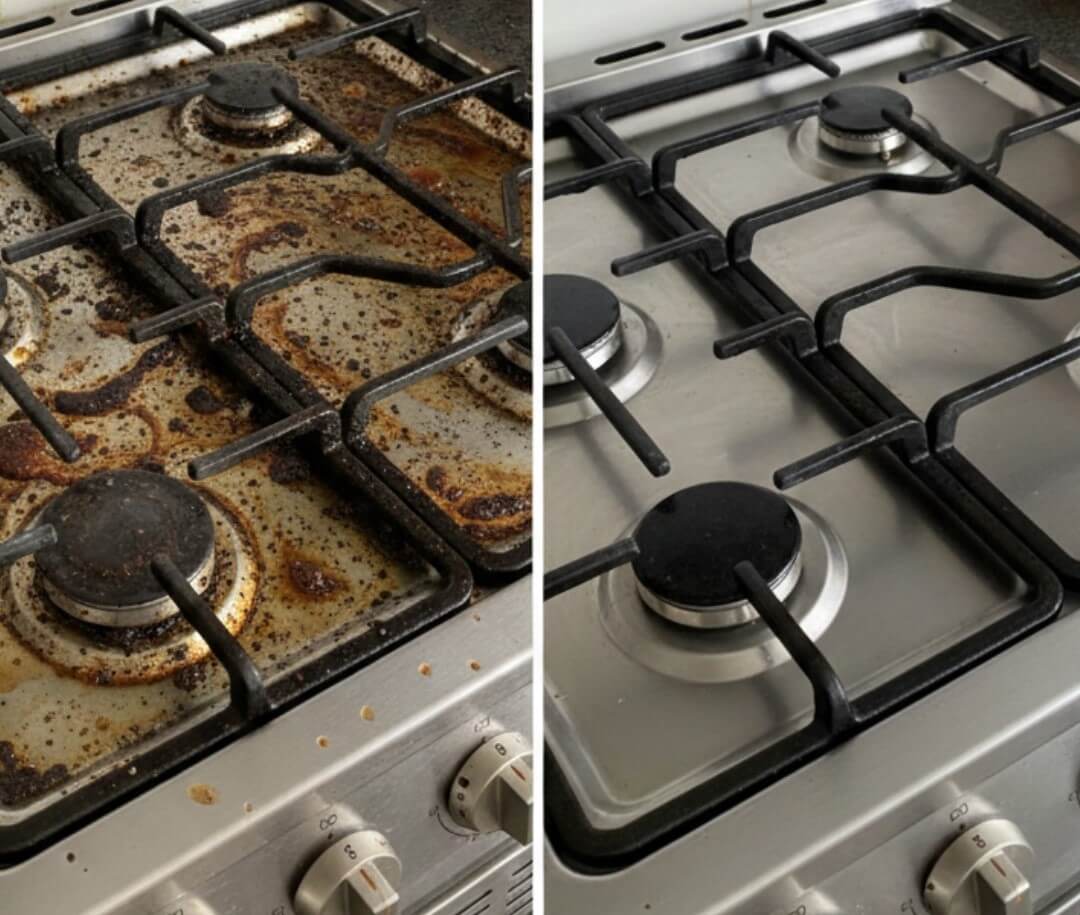
My stove had turned into a disaster zone—burnt-on grease, layers of dried sauces, and crumbs that seemed permanently glued in place. It was embarrassing to look at, and I finally hit the point where enough was enough.

Before you start scrubbing, make sure you have everything you need. Here’s what to gather:
Hot, Soapy Water: Fill your sink or a large basin with very warm water and plenty of dish soap. This will be your main soaking solution.
Baking Soda: Affordable, gentle, and perfect for tackling tough stains.
Vinegar: White vinegar cuts through grease like magic.
Scrubbing Pads or Brushes: You’ll need these for scrubbing away the stuck-on grime.
Microfiber Cloth or Paper Towels: Perfect for wiping, drying, and polishing.
Rubber Gloves: Keep your hands safe and clean throughout the process.
Next, clear the area around your stove so you have room to work. I removed utensils, seasonings, and anything else cluttering the space.
Then I took off the grates and burner caps—usually the dirtiest parts. Let them soak in your hot, soapy water for 15–20 minutes. This softens all the gunk and makes scrubbing much easier later.

With those soaking, I sprinkled baking soda all over the stovetop. It works as a gentle abrasive and helps loosen stubborn stains without damaging the surface.
Using a scrubbing pad, I started working the baking soda in with circular motions. You may need a little elbow grease, but you’ll see the stains begin to loosen quickly. For extra-tough spots, apply more pressure or add a little extra baking soda.
Once the surface was scrubbed, it was time for the best part: vinegar. Pour white vinegar into a spray bottle and generously spray the whole stove. The reaction between vinegar and baking soda creates a bubbly foam that breaks down deep, stuck-on grime.
Let this mixture sit for 5–10 minutes. Take a little break—you’ve earned it.
After the reaction settles, scrub again. The grime lifts so much easier now, and the surface starts to look noticeably cleaner. Repeat the process on any spots that still need attention.
When you’re satisfied, dampen a microfiber cloth or paper towel with clean water and wipe everything down. This removes leftover baking soda and vinegar.
Once the stovetop is clean, dry and polish it with a fresh cloth to bring back its shine.
Now return to your soaked grates and burner caps. Scrub them clean, rinse thoroughly, and dry them before putting everything back together.
Step back and admire your hard work—you’ve completely transformed your stove! It’s amazing how satisfying a clean, shiny stovetop can be.
To keep it looking great, try to wipe spills as soon as they happen. A few seconds of quick cleaning now can save you from doing a full deep-clean later.
Cleaning a grimy stove may feel overwhelming, but once you dive in with the right supplies, it becomes surprisingly doable. Roll up your sleeves, follow these simple steps, and enjoy a spotless, grease-free kitchen centerpiece once again.